- Blog
- Easy, secure sharing - how to set up user groups and collections
By using a password manager, you can ensure your team members are using strong passwords for all of their accounts, which is an absolute must for security.
When you employ Bitwarden for your business, you gain a few extra features that can go a long way to making collaboration considerably easier. One such feature is groups. With groups you can create a new group, assign team members to the group, and even assign a collection to the group. Even better, with each collection you add to a group, you can define one of the following permissions:
Can View
Can View, Except Passwords
Can Edit
Can Edit, Except Passwords
You can give a group access to multiple collections, with different permissions for each collection. I'm going to show you how easy it is to create a new group, add users to the group, and then add collections and assign permissions.
What you'll need
To take advantage of the Groups feature, you must have either a Teams or Enterprise business plan, since you cannot create groups with the Personal plans. That's all you need. Let's create our first group.
Creating your first group
To create a group, you can work via the Bitwarden Web Vault, CLI, or one of the directory sync options to access the Organization management tools. So, point your default browser to vault.bitwarden.com and log in with your account.
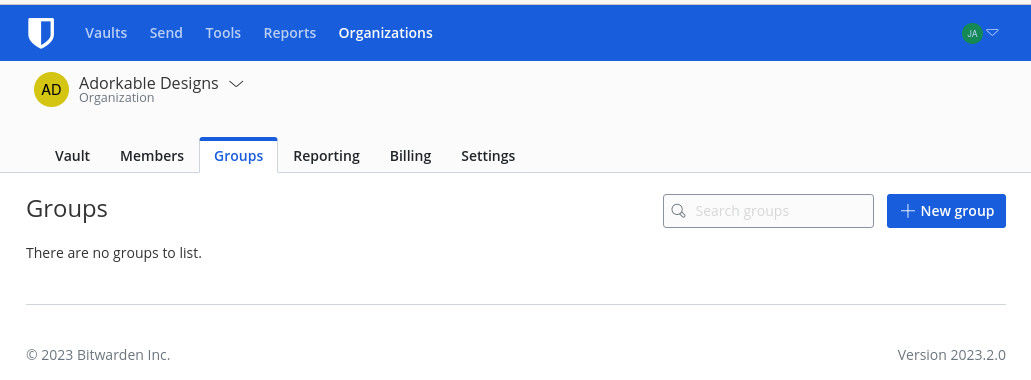
Once you've logged in, click Organizations at the top and you should see the Groups tab under your Organization name (Figure 1).

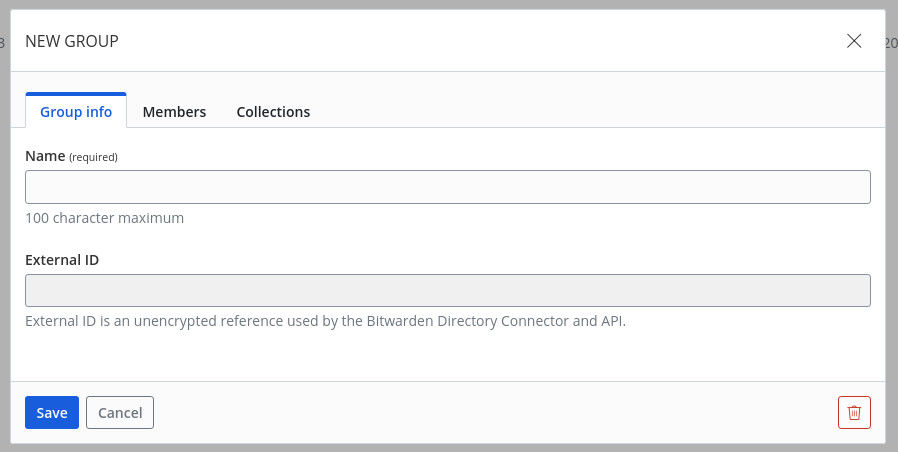
Click New Group and, in the resulting popup window (Figure 2), give the new group a name.

After giving the group a name, click Members. In this tab (Figure 3), select the first member to add to the group from the Select Members drop-down.

Once you've added your first member, you can continue to add more members until you've populated the group with everyone you need.
Click on the Collections tab (Figure 4) and, from the Permission drop-down, select the permission you want to give to the collection. Then select the collection to be added from the Select collections drop-down.

Continue adding collections and assigning permissions, until you have everything you need. With that taken care of, click Save and your group is ready.
If you need to modify the group later (such as adding new members), all you have to do is click the three dot menu associated with the group and click either Edit Info, Members, or Collections to edit one of those features (Figure 5).

One thing to keep in mind is that you (or any members associated with a group) will not see a Groups section in the Bitwarden user interface. Instead, they'll be given access to the vault entries associated with the group collection(s).
And that's all there is to set up a user group for easy sharing in Bitwarden.
Get started with Bitwarden
Sign up for a free business trial to get started with easy, secure sharing for your team.