- Blog
- Two-step login for X with Bitwarden
Securing accounts with two-factor authentication has become a standard practice in the tech industry to combat increasing cyber threats. While the policy on SMS as a free method of two-factor authentication (2FA) has changed over time, Twitter does make 2FA configuration straightforward. This is sometimes also referred to as two-step login for easy understanding.
This post walks through setting up Twitter 2FA using Bitwarden and the built-in Bitwarden Authenticator. Please note that this is a Bitwarden Premium feature. However, far beyond securing Twitter, the extra Bitwarden capabilities of encrypted storage, built-in authentication options, and the ability to use physical security keys will benefit your digital lifestyle.
Enable Twitter 2FA
Enabling two-factor authentication (2FA) on your account is a straightforward process that adds an extra layer of security to your online presence. To get started, follow these steps:
Log in to your X account and choose the three-dot ‘More’ menu options on the left-hand side. From there, navigate to Settings and privacy > Security and account access > Security > Two-factor authentication.
Click on the arrow button next to Two-factor authentication to see the list of 2FA options.
Choose your preferred 2FA method: Authentication app, Security key, or Text message (available only for X Premium subscribers).
Follow the prompts to set up your chosen 2FA method.
Enabling two-factor authentication significantly enhances the security of your account, making it much harder for unauthorized users to gain access.
Choose a 2FA Method
Twitter offers three 2FA methods to secure your account: Authentication app, Security key, and Text message (available only for premium subscribers). Here’s a brief overview of each method:
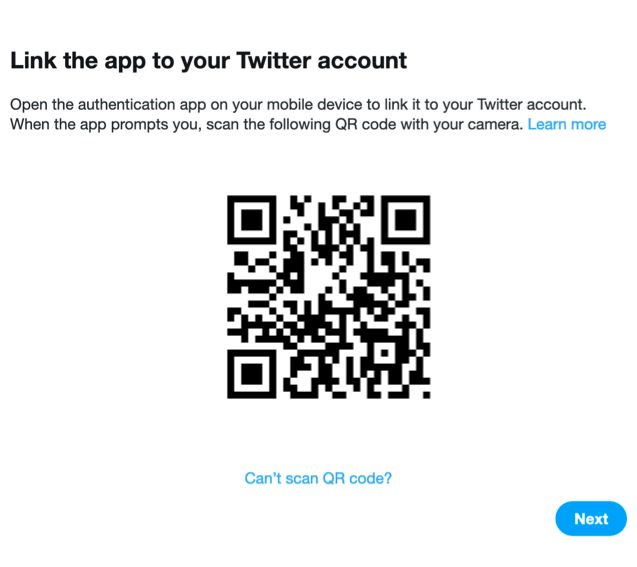
Authentication app: This method uses a time-based one-time password (TOTP) code generated by an authenticator app, such as Bitwarden Authenticator. To set up, click Authentication app, enter your password, and scan the QR code with your authenticator app.
Security key: This method uses a physical security key, such as a YubiKey, to authenticate your login. To set up, click Security key, enter your password, and follow the on-screen instructions to register your security key.
Text message: This method sends a numeric code to your phone via text message. To set up, click Text message, enter your phone number, and confirm your password. Note that this method is only available for premium subscribers.
Each method provides an extra layer of security to your account, so choose the one that best fits your needs and preferences as you set up the Twitter 2FA functionality.
Text message is perhaps the least secure option because there are known scenarios where malicious actors can port your phone number to a new SIM card without your knowledge. This is referred to as SIM jacking. It’s recommended to use two-step login with an authenticator app, which is where the power of Bitwarden comes into play. The two-step login sequence can be created directly within the Bitwarden application, simplifying the login process and strengthening the end-user security profile.
Capture the two factor authentication code
You will eventually be prompted with a QR code to scan with your authenticator application. Here, we can use the integrated Bitwarden authenticator, which is included with Bitwarden Premium features. Another good option is the standalone Bitwarden Authenticator app, which is free for all users.

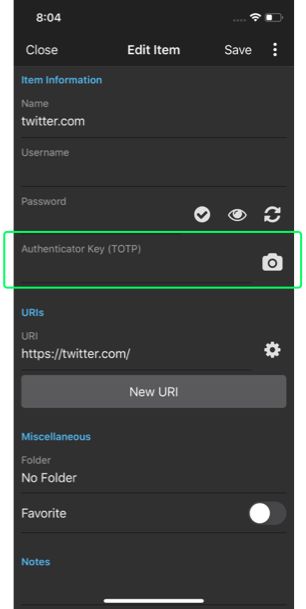
On your mobile device, with Bitwarden open, and the entry for X in Edit mode, you can capture the Authenticator Key (TOTP) by clicking the camera and capturing the QR code from your web browser.

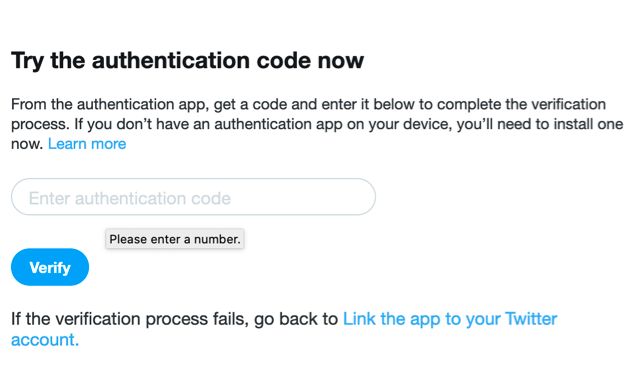
Save the entry and you will then get the 6-digit token from your Bitwarden application to enter into the X website.

After that you’ll be all set!

Generate and save your backup codes
Similar to when you set up two-step login on any website, you are often provided with backup codes should you ever lose your original authentication capability. Keeping track of your backup codes is important! You have many options, but one is to place your backup codes in a Secure Note within Bitwarden. This keeps them separate from your Login info but not so far away that you will misplace them. Of course, some people would recommend keeping your backup codes in a separate place, which is okay too. Just keep them in a safe and memorable place.
Once two-factor authentication is configured within Twitter, you will see an option for ‘Backup Codes.’

Stay secure with Bitwarden Password Manager
For more information on two-step login, please see our Bitwarden Field Guide for Two-Step Login.
Ready to get started with Bitwarden? Register for a free Bitwarden account, or begin a 7-day free trial of our business plans to keep your team and company colleagues safe online.